Showing posts with label cake. Show all posts

Monday, September 26, 2011

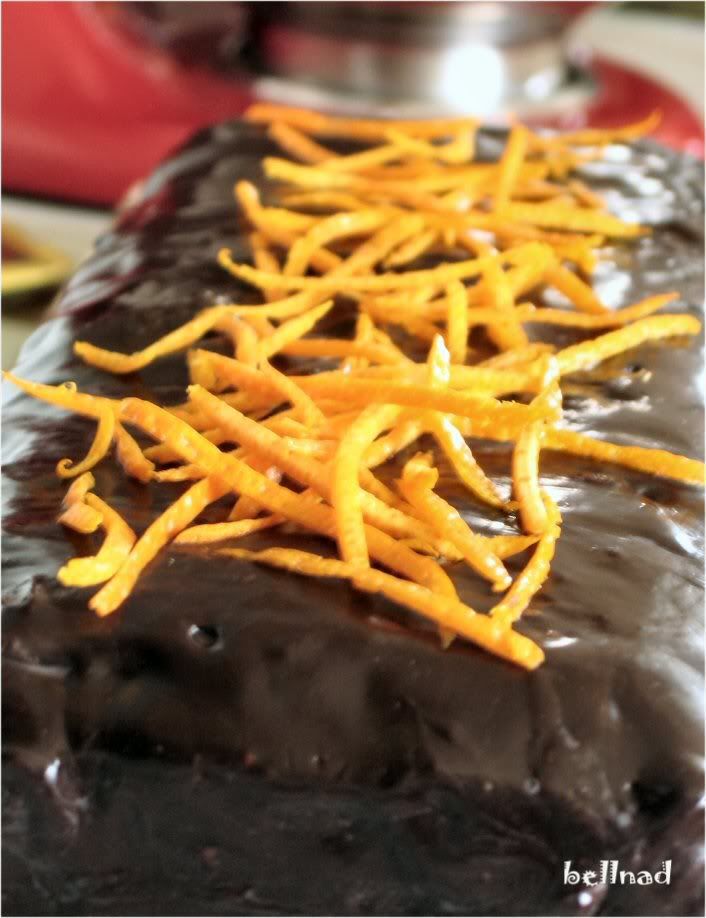
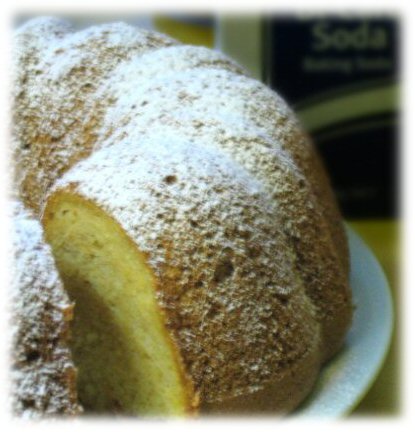
Being In September and Choc Chiffon Cake


Oh, how time flies.... it is September already, and it almost at the end. I won't let September pass without any of my post. Whole month of September has been sooo hectic... Raya, wedding cake orders, exams, assignments, school's tasks, family arriving... and suddenly bammm.... September almost saying good bye. 

I haven't even make an entry about my Lebaran, Happy Eid Mubarak to those who celebrate Ied Fitr. May Allah accepts our good deeds during Ramadhan.  (There are two new entries published together with this entry)


September is equally flower in my thought... Yesss... it's Spring in here...  it's time of intense blooming of colourful ranunculus... oh I love this flower, my last year bulbs which I left in the ground are now at pose. The house beautified with vivid colours cut of its bloom. They stayed fresh in vase for a week or two. 


Anyway... as most of you who celebrate festival of Ied Fitr ... I enjoyed  bake-a-lot of kue kering (cookies). In fact I enjoyed more than last years (that is time when I was away from this blog). I have published my Lebaran's cookies Suji and Melt-in-mouth German cookies and will publish more cookies recipe after this post. This chiffon cake was also part of my baking frenzy. It has deeply chocolate flavour as cocoa is mixed with hot water. The same method uses in Devil food cake.

  
Chocolate Chiffon Cake
Original Recipe by Primarasa, Modified by Riana
and translated by her

Ingredients:

50 g cocoa powder
175 ml hot water
A pinch of salt
175 g flour, sifted
350 caster sugar
1/2 tsp baking soda
1 tsp baking powder
85 ml vegetable oil
400 g egg whites [from +/- 10 eggs @ 70 g (weighed with the shells)]
10 egg yolk
1 tsp vanilla powder/extract (optional)

Garnish:
Powdered sugar

Instruction:
  1. Preheat oven at 180 degree Celcius. Prepare 25 cm chiffon pan, splash the inner part with water. Dissolve cocoa powder and salt in hot water, whisk until smooth, set aside.
  2. Mix together: flour, 2 Tbsp of caster sugar, baking soda and baking powder, mix well. Make a hole in the center, pour vegetable oil, egg yolks, chocolate mixture and vanilla into the hole. Whisk until smooth, set aside.
  3. Beat egg whites with electric mixer at medium speed until frothy, gradually beat in caster sugar, continue beating until soft peak.
  4. Using spatula, gently fold in egg whites to flour-egg batter until well blended.
  5. Pour the batter into pan, tap the pan 2-3 times to let out any excessive bubbles. Bake for about 75 minutes (do the skewer test). Take out from oven, turn the pan upside down and let it cool in this position (about 1 1/2 hour).
  6. Run a long knife along the side of the pan. Turn the cake onto a rack. Run the knife along the bottom of the pan, take off the bottom pan. Turn the cake onto a serving plate or cake board. Garnish as you like.

Note:
  • Use good quality chocolate. Sometimes a chocolate cake doesn’t give us that ‘kicking’ sensation not because it needs more chocolate, but because the chocolate is not good enough. Choose the one that has wonderful smell and deep flavor.
  • If you’re new to dealing with egg whites, search the tips on the internet. It could be tricky, but it’s not that difficult.
  • If the 400 g egg whites give you more than 10 yolks, use the extra yolks in the batter anyway. Whisk it into flour-egg batter.


Monday, May 9, 2011

Almond Rhubarb Cake, Pear Almond Tart and A Beach Visit


The warm day has gone, we are facing real Autumn, cold and wet, really are not my kind of favourite, and I was at home by my self with some big words in my head told me my to do list for today, which is none of them domestic words, except one big loud, baking.   

I've never been in baking frenzy lately, until today. As Monday is my only day off, no piles of laundry, house in sparkly clean, assignment can wait ☺. I've got two ingredients lately that I wanted to whip up, right here in my own kitchen, rhubarb and Packham's pear. The recipe will be in the last section of this post.


Meanwhile, I've just remembered I had some pictures I took while my darling friend and her daughter visited from Sydney in the middle of April 2011, and we took them to St Kilda Pier and Brighton Beach. St Kilda Pier is only 5 kilometers from Melbourne. Its history dates back to 1853 when the St Kilda Pier and Jetty Company constructed a wooden jetty to assist the early settlers in unloading timber, building materials and firewood to St Kilda. As in Parks Victorian stated. 

In the end of the Pier there is a kiosk which quite historic, built in 1904, originally known as Parer's Pavilion and later renamed Kirby's Kiosk but locally known as St Kilda Kiosk.The original construction was devastated by fire on 11 September 2003 and continued on public service with much safe construction. I definitely will come back again for a cup of latte and poppy seed muffin as well a lovely sunrise.


Enjoying the beautiful site of Melbourne offered us a good mood, but suddenly we realized parking meter was ticking too, we went back to where we parked the car. And kept going South to Brighton Beach. This Brighton Suburb surrounded with luxury beach houses with luxury prices. While its beach surrounded with its famous row of vivid plumage of  beach huts or bathing boxes.


Back to baking. Those two cakes I baked today were done using food processor, hilariously easy. 


Pear and Almond Tart was adopted from Donna Hay Issue 39,Winter. To be honest I am in a completely utterly mad about Donna Hay Magazine {Ah well two adverbs, used to express this feeling }. I collect back-dated edition as well as don't want miss the new issue.  I love her vintage props as well as her easy recipe. Simple but true. 


Oopps, someone apparently pushed my double cream in deepest part of fridge, and it got frozen, meanwhile we devoured with custard. That's OK ...   


Pear and Almond Tart

90 gr butter, softened
½ cup (90 gr) brown sugar
2 eggs
1 cup(120gr) almond meal
¼ cup (40 gr) plain flour
¼ teaspoons finely grated lemon rind
2 Packham's pear, peeled, cored and quartered
½ cup (90gr) brown sugar extra (I skipped this)
raw sugar, for sprinkling
double cream, to serve

Preheat oven to 160°C (320°F). Place the butter and sugar in the bowl of food processor and process until just combined. Add the egg, almond meal, flour, baking powder and lemon rind and process until just combined. Spoon the mixture into lightly greased 9.5 cm x 33 cm loose -bottom fluted tart tin. Place the pears and extra  brown sugar in the bowl and toss to coat. Press the pears into the tart mixture and bake for 35-40 minutes or until cooked when tested with skewer. Sprinkle with raw sugar and allow to cool in the tin. Serve in double cream. Serves 6.


For Almond and Rhubarb Cake found recipe in here, with really great reviews. I used olive oil instead  of vegetable oil, its super moist, the right amount of sweetness, absolutely delicious the only drama was... need more generous amount of rhubarbs. Will do for next.


Almond Rhubarb Coffee Cake

  • 330 g packed brown sugar
  • 160 ml vegetable oil
  • 1 egg
  • 5 ml vanilla extract
  • 310 g all-purpose flour
  • 6 g salt
  • 5 g baking soda
  • 235 ml milk
  • 185 g rhubarb, chopped
  • 45 g (½ cup) sliced almonds (I used almond meal)
  • 65 g white sugar
  • 15 g butter, melted
  • 25 g (¼ cup) sliced almonds (I used almond meal)
  1. Preheat oven to 350 degrees F (175 degrees C). Grease two 9 inch round pans.
  2. In a large bowl, beat brown sugar, oil, egg, and vanilla together until smooth. Combine flour, salt and baking soda; add to sugar mixture alternately with milk. Beat until smooth. Stir in rhubarb and 1/2 cup almonds. Pour into prepared pans.
  3. In a small bowl, combine white sugar and butter or margarine. Stir in 1/4 cup almonds. Sprinkle topping over batter.
  4. Bake for 30 to 35 minutes, or until the cake tests done.

Thursday, October 1, 2009

Chocolate Tiramisu


This is the simplest tiramisu that I have ever made, I had a chocolate cake before hand though, it called Brownie Kukus translated as steamed brownie, kinda cakey brownie, well, I must say it is more like a chocolate cake to me. Quite famous in Indonesian cakery.

The tiramisu cream was what the simple one in this cake. I was, sort of running out of time to make such impresive dessert, and there was mascarpone waiting on the fridge, search in the internet simple tiramisu recipe and stumbled across Gordon Ramsay's eggless, quick and easy tiramisu. Well, it's true, it's not like common tiramisu without egg. But .. hey the taste is not bad at all... I would say excellent.

Steamed Brownie

by : Sahak Pribadi

Ingredient A
100 gr Dark cooking Chocolate
150 gr Butter

Ingredient B
5 eggs
200 gr sugar
1 tbs elmusifier, (it's called TBM or SP you could find in any Indonesia groceries, or you can swap it with sweet condense milk)

Ingredient C
100 gr plain flour
20 gr corn flour
40 gr milk powder
40 gr cocoa powder
1 tsp salt
5 gr baking powder

Methods:
1. Prepare a large steamer with the lined square pan which can fit onto the steamer, add the water in the bottom part of the pan.( It's important to put a baking paper on the cake pan as you need to divide the mixture in to 2 batch to get this cake quickly done )
2. Over double boiling pot melt chocolate and butter, set aside to cool down
3. Mix "B ingredients" aprox. 7 minutes, using whisker add gradually chocolate mixture
4. Add C ingredients, gradually
5. Pour in 1/2 of the mixture, steam for about 30 minutes, after cooked through, remove from the pan and continue with the rest of the mixture.


Tiramisu Cream (inspired by Gordon Ramsay)

200 ml cream, cooled in the fridge
450 gr mascarpone cheese
25 gr icing sugar (or to taste)
1 cup coffee mixture (made from 1 cup boiling water + 2 tsp of instant coffee, only needed 2 tbs for this cream, reserve the rest to moist the cake) *remember my kids eat this cake, so i did not want this coffee's taste overpowered the cake :)*
cocoa powder

It's important to set a bowl and beater in the same temperature with cream, so beforehand leave them in the fridge, at least an hour.

Methods:
pour mascarpone in the medium bowl, soften using spatula, add 2 tbs of coffee mixture to mascarpone cheese

in the cooled bowl, pour cream and icing sugar mix until stiff, add mascarpone, mix

prepare chocolate cake, pour with the rest of coffee mixture, add cream in the first layer and using an icing bag squeeze to make a dot on top layer, and dust with cocoa powder, serve

Sunday, May 31, 2009

Onbitjkoek

ONBITJKOEK


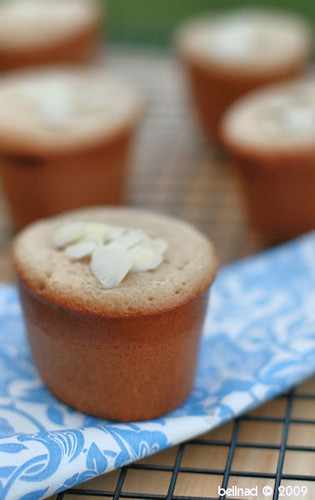
Bukan pertama kali nge-bake onbitjkoek, tapi baru pertama ngebake cake ini tanpa butter ato mentega. Emang seh klo aku baca-baca resep yang asli dari negri londo sana gak pakek butter tapi served with it. Ingredientnya simple banget, aku pakek spice mix botolan yang didalamnya ada kayu manis, pala dan cengkeh. Ini spice mix favouriteku nih.

Pertama kali bikin, aku berexperimen dg mencampur semua bahan jadi satu, termasuk tepungnya tuh, kocok semua sampai kaku, dioven pakek cetakan friands ... ...karena aku pakek cetakan individual gini, waktu pengovenan juga gak perlu lama, hasilnya...? masih moist boow !

Baking kedua, dg cara sesuai resep dg mengocok telur dan gula setelah kaku baru dweh dimasukin tepungnya.... pakek cetakan individual, hasilnya ??? lebih spongy dari hasil pertama.

Baking ketiga, tetep sesuai resep dg pakek cetakan loaf pan. Hhmm... rada gak cocok dwehh... crumbly. Aku milih cara yg kedua.

Pas mo bikin laporan .... emberrrr.... dah pikun ! mana donk foto step by stepnya ??? hahahaha... saking gampangnya bikin cake ini, sampe kelewatan dweh. Simple and cepet banget, klo gak ditimpuk Arfi,aku milih gak pakek step by step dwehh kikikikkkk....

Hayoohhh yang mo coba... gampang bow.... Recomended banget pakek cetakan individual macem muffin gitu buat menjaga kemoistannya Klo gak suka manis kurangi gula menjadi 100 gr. Cocok and light buat temen minum kopi. Kita makan gitu aza tuh gak pakek butter... Dengan iming-iming gak pakek butter di adonannya, hubbyku tambah suka ma cake ini.
Thanks KBB !!.... sampe hari ini dah nge-bake 5 kali.... hahahahah....


jewels
enjoying onbitjkoek and drew drops in my garden...


Onbitjkoek

Sumber: Kue-Kue Indonesia. Yasa Boga-PT Gramedia Jakarta. 2007.

  • 125g gula palem/gula merah
  • 5 kuning telur
  • 3 putih telur
  • campur rata 125g tepung terigu, 1 sdt peres kayumanis bubuk, ½ sdt pala bubuk, ¼ sdt cengkih bubuk
  • 50g kenari, iris tipis
ONBITJKOEK ingredientsmix

Kocok kuning telur dan putih telur, gula palem sampai kental dan naik. Masukkan campuran tepung ke dalam kocokan telur, aduk rata. Tuang ke dalam loyang roti (loaf) (Rita pakek cetakan individual) yang sudah dialas dengan lapisan kertas yang sudah diolesi mentega dan ditaburi tepung. Panggang kurang lebih 20 menit (setengah matang). Taburi irisan kenari. Panggang terus sampai matang, angkat. Potong menurut selera.

ONBITJKOEK on the rack

Friday, January 9, 2009

Black Forest dg Fruit Punch Syrup

foret noir

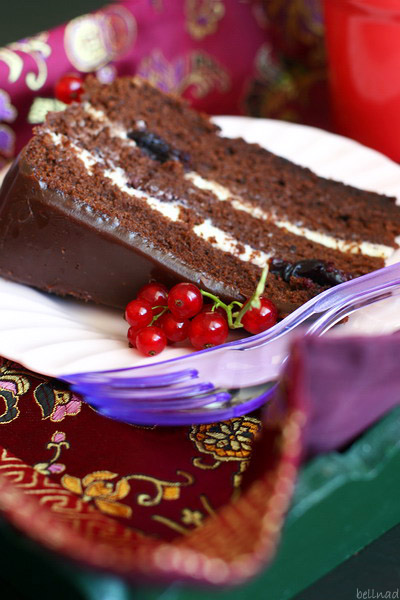
Begitu banyak resep black forrest beredar, kayake post ini gak terlalu menarik.... tetapi klo ada yang tertarik ato wondering gimana seh my black forest turned out... it's darn moist and somewhat tastier. It's hubby's birthday he's fruit junkie. Chocolate sponge
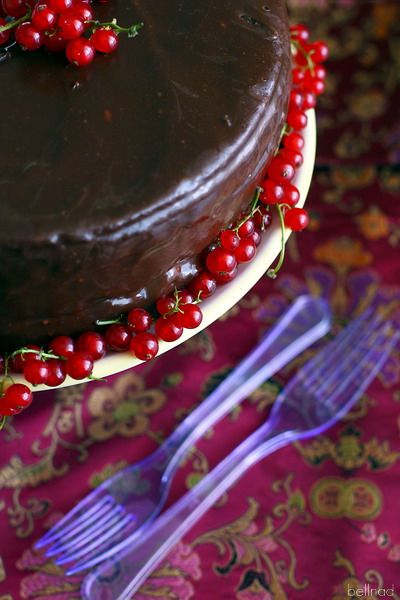
pakek resep teh Uceu yg udah sangat kondang :) ,diguyurr byur pakek syrup fruit punch buatan endonesahhh, ditimpuk pakek black cherries jam, the best jar you can get, low in sugar. Concluded with chocolate ganache. The red current was just for decorating purpose, too sour :P

foret noir


Triple Choco Caramel Cake
Source: teh uceu

Bahan- Bahan :
10 btr Telur
150 gr Gula
1 sdm Emulsifier
140 gr Tepung terigu
60 gr Cocoa Powder
75 gr DCC
100 gr Margarine cair

cara membuat :
1. panaskan margarine sampai mencair, masukan DCC, aduk rata, dinginkan
dan sisihkan.
2. kocok telur dan gula hingga putih mengembang.
3. Tambahkan emulsifier.
4. Masukkan tepung terigu kedalam adonan.
5. Tambahkan kedalam adonan campuran margarine dan DCC, aduk rata.
6. Masukkan adonan kedalam loyang yang telah dialasi kertas roti.
7. Oven dengan suhu + 170oC, hingga matang.
8. Keluarkan dari loyang, dinginkan.

Chocolate Ganache (Pakek separuh resep ini)

500 ml Fresh Cream
500 gr Dark Chocolate
75 gr Butter
cara membuat :
1. panaskan fresh cream dengan api kecil, matikan api.
2. Masukan dark chocolate (iris kasar), butter aduk rata.
3. Dinginkan dan siap untuk dipergunakan.


Bahan tambahan
100 ml fruit punch syrup Marjan, aduk dengan 100 ml Air panas
200 ml Whipped Cream siap pakek


Belah cake Menjadi 3 bagian, siram masing2 dengan simple syrup,
lapisi dg whipped cream plus cherry jam pada dua bagian cake, tumpuk, siram dengan
ganache.

Wednesday, December 17, 2008

Hazelnuts in Flourless Cake

hazelnut in flourless cake

So, here we are already in the middle of December! There are some baking I feel an urge to write about, before the year has ended. An overdue post actually, oh no...

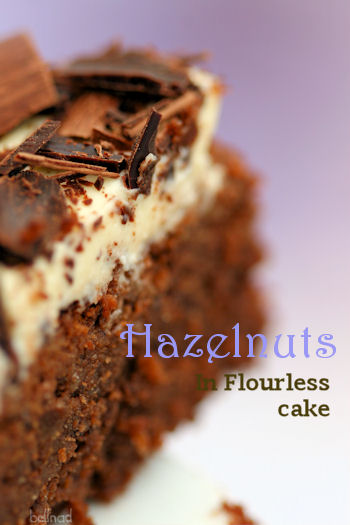
There was time when I like to enjoy chocolate in grown up way, yeah bittersweet chocolate, it's sweet but not-too-sweet. Presented in a rich moist cake with excellent chocolate flavor! and it's gluten-free!

One of easy recipe to make, I recommend making day before since there was quite a bit of prep, baking, and cooling time. The original recipe was Flourless chocolate & pear cake, from Good Food magazine. I was not in the mood for pear in the cake,which I simply don’t have. I'm more into sour cream.

caketakerhazelnutsflourless hazelnuts cake

The amount of all ingredients are in 85 g, the fact that I found only 100g of hazelnuts left on the jar, didn't want leave 15g for nothing, I rounded all ingredients into 100g. The recipe I wrote here only all ingredients I used on the cake. You can view the original recipe in here.

slice it

Hazelnuts in Flourless Cake

original recipe taken from Good Food magazine, November 2008

Ingredients
* 100g butter , plus 1 tbsp extra for tin
* 100g golden caster sugar , plus extra for tin
* 100g dark chocolate , broken into pieces
* 1tbs pure apple juice
* 4 eggs , separated
* 100g hazelnuts , toasted and ground in a food processor
topping
* 200 ml sour cream
* 2 tbs sugar
* grated chocolate

1. Cut a circle of baking parchment to fit the base of a 23cm loose-bottomed tin. Melt 1 tbsp butter and brush the inside of the tin, then line the base with the parchment and brush again with more butter. Spoon in 2 tbsp caster sugar, swirl it around to coat the base and sides, then tip out any excess.
2. Heat oven to 180C/fan 160C/gas 4. Melt the chocolate and butter in a bowl over a pan of hot water, remove from the heat, stir in the apple juice and leave to cool. Whisk the egg yolks with the sugar in a large bowl until pale and thick; fold into the chocolate with the hazelnuts.
3. In a separate bowl, with a clean whisk (I used electric mixer), beat the whites until they reach a soft peak (try not to whisk them too stiffly or you'll have trouble folding them in). Stir a spoonful of the whites into the chocolate mix, then carefully fold in the rest of them in 2 additions. Spoon into the prepared tin. Bake for 40 mins until cake is cooked all the way through. Leave to cool in the tin slightly before releasing it, then place on a rack to cool completely.

Topping
Combine sour cream and sugar. Spread over the cake right to the edges, cover loosely with foil and refrigerate for 8 hours or overnight. Topped with grated chocolate before served.

for you

Tuesday, September 30, 2008

Wingko Babat


If you wondering what I'm doing now, I might in the kitchen making this kinda coconut cake as part of my customer order. Every time I make this cake the smell of coconut filled the kitchen and there will be another order from hubby.... lol...
This cake is a form of combo of sweetness and coconut. Here's the recipe that I promised to some of you ^_^

Ini resep yang ala ndeso tradisional banget, gak pakek telur and butter


Wingko
500 gr glutenous rice flour
500 gr grated coconut ( you may find it in a frozen section in Asian Grocery)
600 ml coconut milk
270 gr sugar
1 tsp salt

Put coconut milk in the saucepan bring to boil. Set aside let it cool mix in grated coconut.
On the medium bowl add flour, sugar, salt add coconut mixture mix thoroughly. Pour the mixture into greased square tin. Bake about 40 minute or until golden brown in both side.
It's best cut and served after the next day.

wingko babat

Tuesday, March 25, 2008

Vanilla Pandan Swiss Roll

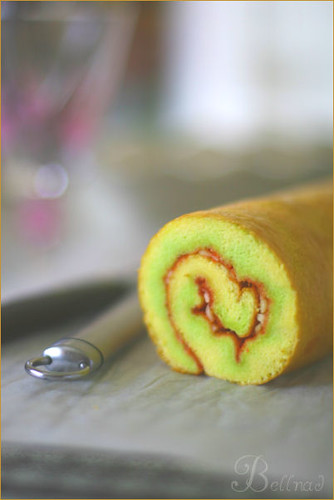
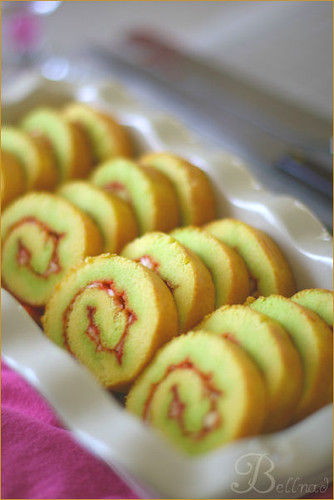
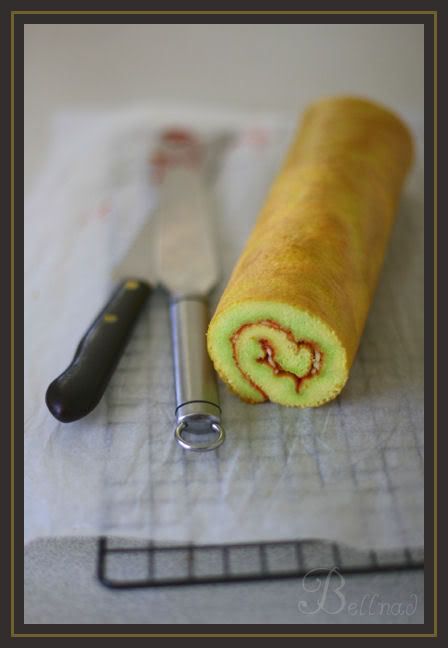
Vanilla pandan swiss roll

In most cases, rolling up swiss roll often as soon as it comes out from the oven . Which is I don't ! Rolling up while it is still hot flexible enough to roll without cracking. While, some times it left cake surface stuck to tea towel or baking paper. I prefer to cool down a little while to release steam out. Then roll it using parchment paper or waxed baking paper (I use glad brand (^_^) ). I was success with the first roll followed with many rolls with different idea of flavors.

And another key at baking swiss roll is using upper element/heat in the oven at the last 10 minutes or some only 5 minutes, depends on the oven. The baking period varies from recipe to recipe depend on thickness of the cake. Mostly take 20 to 25 minute.

I tried a lot recipes and sometimes experiment with my own recipe (^_^). For these pictures I used Inong recipe. Blueberries Chiz Roll Which is practically easy and less trouble.


Vanilla pandan swiss roll

No blueberries this time, batter divided into vanilla and pandan instead. Pandan is tropical plant use widely for cooking and baking to enhance the fragrance of the food, juiced with small amount of water to get the beautiful fragrance and color. I didn't use pandan juice though, I used 1/4 tsp pandan paste instead. Available also in Asian grocery (^_^).

Here is the roll recipe:

Ingredients A:
7 egg yolks
4 egg whites
80 gr sugar ( I use icing sugar for less sweet)
50 gr self raising flour
1 tbs milk powder
1 tsp emulsifier (ovalet, sponge, tbm, sp can be purchased in Indonesian grocery)
1 tbs water

Ingredients B:

65 gr butter-- melted
1 tablespoon vanilla extract (I used vanilla crystal)
1/4 tsp pandan paste

Filling:
Raspberry jam
100 gr Shredded cheddar cheese

How to:

Preheat oven at 170 degrees . Lightly grease a swiss roll tin (30x24 cms) & line the base with baking paper.

In electric mixer bowl throw in all the ingredients A. Beat until
white and fluffy. Turn off mixer and add melted butter gradually while stirring, scrap the bottom of the bowl. Add vanilla and spread half the mixture in swiss roll tin. Mix pandan paste on the rest of mixture, DO NOT overmix. Pour into vanilla mixture. Eventually the green mixture will stay in the bottom.
Pop it in the oven for 20 minutes. 10 minutes on lower heat and 10 minutes on upper heat. (Again it depends on your oven !)


Bake for 20 mins. Meanwhile, place a wire rack on a work surface (you can swapped it with tea towel instead), cover with baking paper.

When the cake is cooked, cool down for 5 mins. And turn it out onto baking paper. Spread the jam and cheese. Roll the cake up from the long side, don't worry if you squeeze a little bit. Place the cake seam-side down onto serving tray. Trim each side using serrated knife.


Photobucket

Monday, October 1, 2007

Lemon Ricotta Cake

lemonricottacake

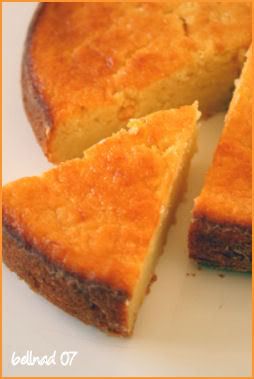
This cake is not as simple as it looks. It's moist, rich and dense cake. The lemon flavor really bursts from the cake . No wonder my family like it.

Lemon Ricotta Cake
  • 175g softened butter
  • 175g caster sugar
  • 3 lemons, zested
  • 3 eggs, separated
  • 250g ricotta cheese
  • 125g self-raising flour
  • 1 tsp baking powder

Heat the oven to 180C/fan 160C/gas 4. Butter and flour an 18cm spring-form cake tin.

Beat the butter and sugar with an electric whisk until light and fluffy then beat in the zest, yolks and ricotta.

Whisk the egg whites to stiff peaks, then fold into the ricotta mixture.

Fold in the flour and baking powder then spoon the mixture into the tin. Bake for 35 minutes until risen, firm and golden in colour.

Cool for an hour in the tin.

Recipe taken from olive magazine, April 2006.

Thursday, June 28, 2007

Another Shots

Still... exciting with the bolkus...
same recipe ...
same thickness of dough...
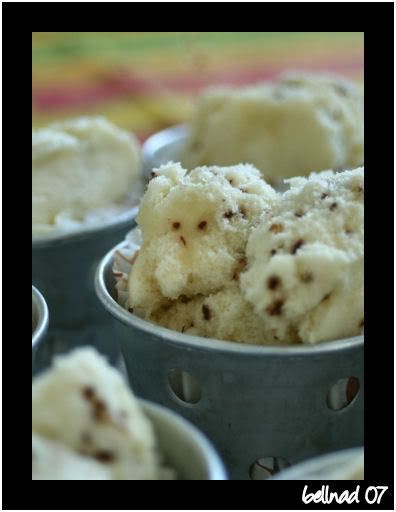
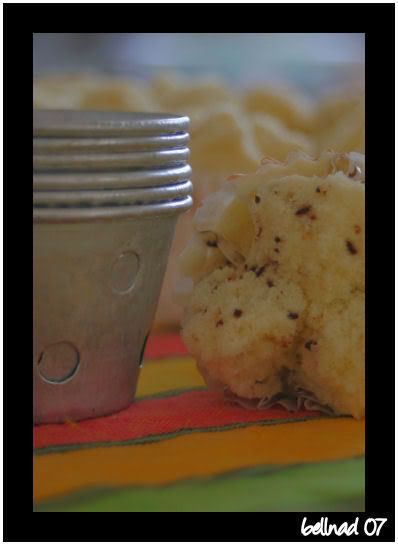
different cup mould. :)

Friday, June 22, 2007

McHotty, McSteamy....Mckaar.... (the bolkus)

Hi... temans... terimakasih buat temen semua yang dah ninggalin pesen di shoutbox, pm di multiply, juga email teman-teman yang penuh perhatian.
Terima kasih juga atas doanya...
It means alot to me.
Semoga Allah SWT membalas kebaikan temen-temen semua...
Amien

------------------------------------------------

Back to business...

Adakah temen-temen yang masih kena kutukan bolkus ?? well... you are not alone.. Joint the club... Singkatnya "SAMA" aku juga !

Semenjak aku umur 14 tahun seudah aku liat tulisan resep bolu kukus di sebuah majalah yang fotonya sangat menggiurkan....dengan kemekaran yang mempesona... so..mouth watering.. keliatan sangat empuk memikat... uuhhh.... gemess... ngliatnya aku cobain resep di majalah itu. Di dapur ibuku the bolkus put on the test...

Setelah berkutat sesorean ... bahan ditimbang dg seksama... kocok... dikukus...huallahh gagal yang ada malah bantat... Aku yakin bukan resepnya yang salah.. tapi akunya yang belom memahami tekhniknya. See that's the different between cooking and baking... in this case steaming. Segagal-gagalnya masak masih bisa ketolong... lha ini bantat yang ku dapat.

That's the first trial... and there were second and third trial.... all trials ended up with hall of shame...

And one day.... I collected my courage to do once more... this time... I did it with my own formula... It should be thick! That's knotty on my mind.... and the result viola... I did it...!

Yeah that was rita kecil..mate... mungkin secara kebetulan aza... seudah berhasil gak pernah ada lagi bolkus bantat di dapur.. bahkan yang gak bantat pun.. juga gak ada, aku gak pernah bikin lagi sesudah itu.

Tetapi setelah berumah tangga dan tinggal dirantau... bayang-bayang bolu kukus datang lagi. Tapi kali ini bolkusku gak pernah bantat tapi juga gak pernah mekar sampai ngakakkk... Biar begitu kita tetep suka sama bolkus yang ini... lembut biar sampe beberapa hari asal disimpen ditempat tertutup. The making of bolkus jalan terus... gak masalah biar gak ngakak yang penting kan rasanya. Jadi klo ngasih temen lebih baek di kukus dalam cetakan besar sekalian trus pas mo nganterin dipotong kotak-kotak gitu heheh... ya kan gak ketauan klo gak ngakak .... Ternyata temenku suka lho malah dia minta resepnya.

Setelah jalan-jalan di blog teman-teman yang berhasil bikin bolu kukus... (am I the only one failed here?) Dua hari yang lalu aku coba lagi pakek resep mbak Fat yang bahannya 2212 itu tapi kali ini aku masukin baking powder... dengan steamer listrik kayak punya mbak Fat. Sebenernya steamer ini aku beli bukan buat bolkus tapi cenderung buat kukus sayuran dan gak terbersit sekalipun buat bikin bolkus... dodol banget...


Akhirnya dengan nambahin baking powder, semua bahan aku campurin jadi satu dan kocok sekaligus, sampai mengental... bolkusku mekar.... hiks...hiks... *terharu* for the first time ever... Karena kukusannya kan bening jadi keliatan prosesnya. Trus pas ngintip contekannya di bilang kukus 20 menit... aku tunggu 20 menit .. padahal sudah mekar ayu tuh... nunggunya sambil ditinggal-tinggal. Begitu alarm buzz buruan aku matiin en angkat WAKKSSS..... bolkus yang dah ngembang ayu jadi mengkeret hikssss...... kebanyakan nyerep air dia...

Well at least aku dah bikin bolkus ngakak... biarpun akhirnya mengkeret.

Saat itu juga aku bikin lagi dengan resep favourite ku. Dengan nambahin baking powder juga...
Kenapa baking powder ? Karena botol soda udah dibuka sebelomnya (kita beli kan at least satu litter gitu). Jadi biar aman aku tambahin aza. Dan kali ini aku gak mo gagal aku tungguin .... eeennn... MEKAR...NGAKAK.... huhuy... seneng banget.. cuman perlu waktu 12 menit bolkus sudah mekar dan matang...

Finally ... after all this years... I can achieve what I've dreaming for...huahahahaha... NGAKAK BOLKUS.

Selain dengan baking powder aku rasa penggunaan kukusan tumpuk tiga yang aku pakai ini juga pengaruh ... karena adonan gak perlu nunggu giliran masuk di kukusan. The other good thing with this steamer is you can use it for storage too. See the picture


Resep favouriteku ngambil dari Bogasari:

BOLU KUKUS (revised)

(oleh Bogasari ditambahin lagi ma rita)
Bahan :
250 gr tepung terigu Kunci Biru
250 gr gula pasir
3 butir telur ayam
160 cc air kelapa/air soda
pewarna coklat, mocca, dan merah
(Aku tambahin 1 sdt baking powder plus 1 sdt sp ato any emulsifier)

Cara Memasak :
- Telur dan gula dikocok selama 1/2 jam dengan kecepatan tinggi
(aku kocok semua bahan jadi satu sampai kental )
- Masukkan tepung sedikit-sedikit sambil diaduk
- Masukkan air kelapa/air soda, aduk rata
- Ambil sedikit adonan untuk ditambah pewarna
- Tuangkan ke dalam cetakan bolu kukus yang sudah dilapisi kertas roti. Di atasnya tambahkan 1 sendok makan adonan yang berwarna
- Kukus selama kurang lebih 10 menit


Monday, April 23, 2007

White Choc Mud Cake

Hello there.... I'm back....
Phew.... mestinya resep dibawah ini kudunya diposting segera seudah posting pinky flowery cake, but.... berhubung aku gak bisa ngadep computer lama-lama yaaa... mohon maap atas kekilapan..Baru sekarang bisa diposting.

Mud cake ini so Aussie banget, soale gak pernah nemu resep ini di laen negara, yang ada jenisnya laen. Cake ini sangat kaya....maksute rich gitu lho hiahahaha... soft saat keluar dari oven, jadi jangan coba-coba dikeluarkan saat masih pul-ngepul bisa pecah bawahnya. Yak bener... pengalaman pertama ku heheh...Jangan lupa lapisin bawahnya dengan baking paper.

Resep asli aku nemu dari internet, tapi dah aku babat habis-habisan jadinya gini neh resepnya.

Sempet diuji juga sama lidah Aussie... commentnya wow...wow... gimana gak 'wow', orang gratisan heheheh.. enjoy !

White Choc Mud Cake

1 1/2 cup gula
1 1/4 cups tepung terigu
1 cup self raising flour
1/2 cup maizena
1/2 sdt baking powder
6 butir telur
1 cup buttermilk
1 sdt vanilla essence (option)
1/2 sdt garam
300g butter
300g white chocolate, potong kecil

Cara:
Panaskan oven 150 degress celcius, olesin loyang bundar 23 cm dengan butter atau minyak (klo aku ambil praktisnya aku semprot pakek cooking spray) alasin dengan parchment paper

Tim white chocolate sampe leleh masukkan butter aduk-aduk sampai butter leleh. segera angkat sisihkan.

Masukkan gula kedalam mangkuk besar, tambahkan tepung, maizena, self raising flour dan baking powder yang sudah diayak.

Buat lubang ditengahnya masukkan telur aduk dengan sendok metal (aku pakek flat paddle di mixerku, kecepatan rendah) tambahkan buttermilk, vanilla dan garam. Aduk rata

Tambahkan adonan white chocolate dan butter aduk sampai rata. Tuang ke loyang. Oven selama 2 1/4 jam ..... HA HA !! lama ya... hiak... buat ngakalin ini kadang aku akalin pakek 2 loyang, cuman perlu waktu 1 jam. Nantinya tinggal di sandwich sama jam.

Setelah matang. Tusuk lidi keluar dengan bersih... Jangan langsung dikeluarin dari loyang. Tunggu sampe dingin. Karena saat hangat cake ini sangat soft.

Dengan menggunakan pisau roti potong permukaan atas cake, balikkan... hias deh...


Saturday, February 17, 2007

Marbled Colour

Ini sebenernya hasil bakingku minggu lalu, cake marmer ato marble cake yang biasanya umum di acara arisan ibu-ibu pkk, biasanya dibuat dg cara mengocok telur dan gula dulu. Baru menambahkan tepung dan mentega.

Aku coba dengan cara yang lain. Mencampur bahan seperti cara bikin chiffon cake. Yaitu mengocok putih telur dulu sampai mengembang terus menambahkan sedikit gula. Dan mengocok adonan kuning telor dan semua sisa bahan kecuali butter terpisah. Kemudian mencampurkan adonan putih telur ke adonan kuning secara bertahap, baru mencampurkan butter cair. And aku juga pakek cetakan chiffon cake :)...

Hasilnya lebih spongy, hhhmmm aku suka texturenya karena lebih ringan dan soft. Biar gak bosan aku bikin 3 warna. Putih ,coklat dan hijau. Hijaunya pakek pasta pandan. Hasilnya kayak difoto tuh... hmmm ini tetep resep cake marmerku yang sudah kuno itu tapi aku menikmatinya dengan cara yang laen... tertarik ??? ini deh resep aslinya....


Cake Marmer
Bahan:
250 gr tepung terigu
10 kuning telur
8 putih telur
225 gr. gula pasir
1 sdt SP (emulsifier)
225 gr butter cair
1 sdt Chocolate pasta

Cara membuat:
- Siapkan oven dengan panas 170 derajat Celcius.
- Telur ayam, SP, gula pasir dikocok sampai putih dan kaku.
- Masukkan tepung terigu aduk sampai rata.
- Masukkan butter cair secara perlahan, aduk sampai rata.
- Adonan dibagi dua bagian, satu bagian ditambahkan coklat pasta. (klo mo yang pakek pandan ya dibagi tiga donk)
- Siapkan loyang bundar berlobang tengah poles dengan margarine dan taburi tepung.
- Masukkan adonan putih dulu
- Masukkan adonan coklat ditengah sepanjang lingkaran (jangan dilobangnya yak heheh..)
- Panggang marmer cake selama 45 menit.

Sunday, November 19, 2006

Opera Cake (in chocolate version)

Selalu ada kopi dalam cake opera, karena aku pingin ini cake bisa dimakan oleh anak-anak juga akhirnya aku hilangkan semua kopi di resep ini. Resep diambil dari www.scena.org


Resepnya gak susah-susah amat kok bikinnya. Gak terlalu ribet juga karena gak pakek kopi. Jadi gak ada acara siram menyiram kopi.

Loyang yang aku pakek loyang lapis surabaya kiriman kampung halaman. Ukuran 20 x 10 cm. Klo kurang satu (krn umumnya lapis sby kan pakek 3 loyang yah) Pakek aza loyang yang agak gedean ntar di potong jadi ukuran yang sama. Sisa potongannya bisa dibikin truffle lho ..

Soal rasa jangan diragukan heheh... perpaduan coklat en almond yang perfect. Klo bisa gunakan good quality chocolate sih.

Bahan:
Joconda biscuit
• 125 g Almond bubuk
• 125 g gula
• 30 g tepung
• 4 kuning telur
• 25 g butter
• 4 putih telur
• 20 g gula

Chocolate ganache
• 200 g Dark chocolate
• 150 g cream Glazing
• 80 g Dark chocolate
• 80 g cream

Cara:
Panaskan oven terlebih dahulu.Campur almond bubuk, gula, tepung dan kuning telur yang sudah dikocok sebentar. Aduk terus sampai rata. Adonan akan berupa paste.

Di mangkuk laen kocok putih telur sampai mengembang masukkan gula sambil tetap dikocok sampai soft peakMasukkan 1/3 bagian adonan putih telur ke adonan almond, aduk perlahan sampai rata. Masukkan adonan ini ke adonan putih telur perlahan aduk rata.

Bagi adonan kedalam 4 loyang 10 x 20 cm. Oven sampai kira-kira 15 menit di suhu 180 derajat.

Chocolate ganache:
Lelehkan coklat diatas double boiler pan, (mangkuk berisi coklat diletakkan diatas panci yang berisi air panas, dimasak dengan api yang kecil) Setelah coklat leleh masukkan cream. Aduk -aduk.
Angkat mangkuk dari atas panci. Aduk lagi sampai rata. Dinginkan

Glazing:
Sama dengan cara membuat chocolate ganache

Penyelesaian :Setelah dingin tuang 1 lembar biscuit (ato cake if you think so) dengan sebagian ganache sampai rata klo masih terlalu encer masukkan kedalam kulkas sebentar. Kerjakan sampai keempat cake terlapisi ganache, kecuali yang bagian paling atas. Tuang glaze pada lapisan paling atas. Lebih bagus hasilnya saat glaze masih hangat. Masukkan kedalam kulkas setelah set, Potong pinggir cake dengan rapi. Pakek pisau roti deh biar rapi

Monday, August 28, 2006

English Fruit Cake


Minggu sore iseng nyoba resep yang ada di detik.com, English Fruit cake, pertama baca resepnya aku jadi inget ama fruit cake yang suka aku beli di Hero Malang jadul banget, aku suka jenis fruit cake ini karena texturenya lebih ringan dan yang penting gak terlalu spicy.

Bener deh... pas cakenya dah mateng, sempet noel ujung cake eehhmmm... ini nih yang aku cari. Aku bikin sesuai resep dibawah ini hanya buah-buahannya yang aku ganti. Aku pakek craisin instead of raisin ato kismis. Craisin ini kismis yang terbuat dari buah cranberry tapi rasanya lebih legit.. gak heran deh klo aku cuman pakek separuh dari resep dibawah ini, abisnya yang separuh dah masuk perut anakku hiahaha....

Trus walnut aku ganti ma almond (sesuai persediaan seh), dah gitu ditambahin ma parutan kulit jeruk terakhir choc chip. Saking cintanya ma parutan jeruk akhirnya setelah disiram ganache aku tambahin lagi parutan jeruknya, sip deh. heheh...Hhhmm ... pas deh buat tea time.


Photobucket - Video and Image Hosting

English Fruit Cake
source :Colvmbus Fine Dining Restaurant - detikfood

Bahan:
180 g putih telur ayam
90 g gula bubuk
265 g mentega tawar
115 g gula pasir
10 g esens lemon (aku gak pakek esens, krn udah aku ganti pakek parutan jeruk)
10 g esens vanilla
120 g kuning telur ayam
120 g kacang walnut, cincang
60 g kismis
200 g mixed peel
65 g dark couverture chocolate, potong kecil
285 g tepung terigu

Cara membuat:
· Kocok putih telur dan gula bubuk hingga kental dan kaku. Sisihkan.
· Kocok mentega dan gula hingga lembut.
· Masukkan esens, kocok rata.
· Tambahkan kuning telur satu per satu sambil kocok hingga pucat warnanya.
· Masukkan tepung terigu dan bahan-bahan kering lainnya.
· Masukkan putih telur kocok ke dalam adonan, aduk hingga rata.
· Tuang ke dalam loyang yang sudah disemir mentega dan ditaburi tepung terigu.
· Ratakan.
· Panggang dalam oven panas 180 C selama 30 menit.· Angkat dan dinginkan.Untuk 1 loyang ukuran 22 cm X 22 cm. (klo pakek loyang loaf kayak yang aku bikin panas oven 170deg celcius selama kurleb 45 menit)

Tuesday, January 31, 2006

A Treat For Tooth

I used to be sweet tooth, quit already,
…Oh no ! I’m no quitter…. No, I’m not. I’m still such sweet tooth, at least until the last crumbs from this cake.
ehhmmm...


Espresso Choco Cake

(sorry aku lupa dari mana dapet nih resep yg jelas resep ini pernah berseliweran di milis, sorry for not giving you such a credit, thanks for the recipe btw :) ) updated : resep by Lia Dapur Gue... thanks Li

Espresso Choco Mix:
175 gr dark cooking chocolate, cincang kasar
150 gr margarin
50 gr butter
2 sdm coklat bubuk
2 sdm kopi instan dilarutkan dengan 1 sdm air mendidih ½ sdt garam


Cara:
Tim coklat cincang sampe leleh, angkat. Masukin sisa bahan lainnya, aduk rata. Diamkan sampe semua margarin leleh, aduk sekali lagi sampe bener2 rata, sisihkan.


Cake:
3 butir telur
150 gr gula pasir

200 gr terigu protein sedang
1 resep Espresso Choco Mix
100 ml susu cair
Cara:
Kocok gula & telur dengan kecepatan tinggi sampe putih & kental.
Masukkan terigu, susu cair & coklat mix bertahap & bergantian sambil diaduk dengan kecepatan rendah diselingi spatula.
Tuang kedalam loyang 20 x 20 yang dasarnya telah dialasi baking sheet & dioles mentega hingga sisi2nya.
Oven 45 menit ato sampe mateng, keluarkan & diamkan di dalam loyang sampe dingin baru keluarkan dari loyang.


Espresso Choco Glaze:
150 gr dark cooking chocolate, cincang kasar
100 ml susu kental manis
75 gr margarin
2 sdm kopi instan dilarutkan dengan 1 sdm air mendidih
Cara:
Tim coklat & susu kental sampe leleh, tambahkan margarin & larutan kopi. Aduk rata & diamkan sampe mengental. Aduk2 sampe terbentuk tekstur yang siap oles. Bagi empat sama rata, sisihkan.

Penyelesaian:
Belah cake jadi empat , iya empat lembar... Siapin selembar cake, oles permukaannya dengan seperempat bagian espresso glaze sampe rata.
Tumpuk dengan selembar cake yang lain, oles lagi sampe rata. Ulangi sampe cake habis & olesan habis. Hias sesue slera, siap disajikan.

Wednesday, November 30, 2005

Chiffon Keju

Cake ini nurut aku enak banget klo udah dingin, lembuuut banget. Saking demennya aku bikin sampe empat kali huahahaa.... abis belom puas menikmati eh ada tamu pada demen deh, laris manis...

Loyang gak perlu di semprot minyak agar adonan bisa mengembang sempurna. Kejunya aku parut agak gedean ukurannya jadi lebih terasa cheesy. Hhmmmm...

Aku ambil resep ini dari dapurnya Pennylane.

Chiffon Keju

Source: Seri Masak Femina Primarasa - Cake Istimewa Semua Yummy

Bahan:
150 g terigu protein rendah, ayak
100 g keju cheddar, parut
1/2 sdt soda kue1 sdt baking powder
1/2 sdt garam100 g gula kastor
100 ml minyak goreng
100 ml susu cair
5 kuning telur (dari telur @ 70 g)
7 putih telur (dari telur @ 70 g)
1/2 sdt cream of tartar

Cara Membuat:
Panaskan oven pada 180 derajat Celcius. Siapkan loyang chiffon (aku sih pakek loyang biasa aja, abis belom punya) diameter 24 cm. Jika ada, gunakan loyang chiffon berkaki. Jangan olesi bagian dalamnya dengan minyak/margarin.

Campur terigu dengan keju parut, soda kue, baking powder, garam, dan 2 sdm gula kastor, aduk rata. Buat lubang di tengah campura tepung, tuangi minyak goreng, susu dan kuning telur. Aduk dengan pengocok kawat hingga licin, sisihkan.

Kocok putih telur dengan mikser berkecepatan sedang hingga berbusa, masukkan cream of tartar dan sisa gula dalam beberapa tahapan. Kocok hingga putih telur membentuk ujung yang tumpul waktu mikser diangkat.

Masukkan putih telur dalam beberapa tahapan ke dalam adonan tepung, aduk perlahan hingga rata.

Perciki bagian dalam loyang dengan air masak
Tuang adonan ke dalam loyang. Masukkan dalam oven, panggang hingga matang (lk 75 menit). Tandanya tidak ada sisa adonan yang menempel ketika ditusuk dengan lidi.

Keluarkan kue dari oven, segera balikkan loyang hingga kue benar-benar dingin (lk 1 1/2 jam). Keluarkan kue dari loyang dengan bantuan spatula/pisau panjang.