Showing posts with label Asian. Show all posts

Friday, August 26, 2011

Suji Cookies


I firstly knew this kinda of cookie when I was invited for iftar by Singaporean family. When she said its name, suji it made  my eyes opened wider as it was actually pale gold in colour. "Does it has suji in it ? " She said no, it's just used ghee butter. I'm not very fond of ghee, but this cookies was intriguing. I didn't feel like to order cos I still have jaaaars.. and jars of cookies for Lebaran, and you know my other reason was I'd like to bake it with my bare hands ☺. Though I felt hesitate to ask for recipe.


Completely forgot about this until I lined up in post office, and I saw "Poh's Kitchen-My Cooking Adventures" and from quick look I saw suji recipe, and put it as my reason I decided to purchase it, err... actually there was something else, the book was on sale ! In this book, Poh uses ghee, she creamed it while other recipe use melting method. I'm not sure what's different in result. Will try different method next time, meanwhile I am happy with  this recipe.


Suji Cookies with Pandan

230 gr ghee
150 gr caster or icing sugar 
1 tsp natural vanilla paste or almond essence
300 gr plain flour, shifted
1 cup (100 gr) almond meal
Pandan paste for green colour (Rita)

Methods
Preheat the oven to 16 °. Line a baking tray with baking paper.

With mixer, cream the ghee, sugar and vanilla or almond essence until pale and fluffy. Add the flour and baking powder and mix with  wooden spoon. Add the almond meal and mix until combined. (Rita add pandan paste)

Roll the dough into balls the size of large marble. Place on prepared tray about 2 cm apart. If your hands get very sticky, just wash and moisten slightly before continuing to roll. Top with piece of cherry and squash down a little. (I rolled into rice cereal (Rita))  

Bake for 10-12 minute or until pale gold-these are not meant to be golden brown. Cold on a wire rack and store in an airtight container.


Tuesday, April 26, 2011

Family Affair and Fruit Salad in Rujak Manis Sauce


It amazed me how the weather these days, it feels like Autumn knocking on our door, but Summer won't swap the place. During the weekend, with this much loved Spring like weather, when we decided to stay at home rather than go wander. Mostly we are trying to finish off our project. Yeah .. there'll always be some project waiting to be handled. We have done a big cabinet for our dining room, that's what I'm most grateful for. The most challenging one had to be finished first. Will tell you about this on later post.

Our last project was a redecorating coffee table from lounge room, that has a glass top, into display coffee table. AG, which is hubby, laid a board underneath the glass so kids could decorate with sand and put our shell collection in to display. The table was actually a different kind of white shades, we, umm, this time AG sprayed  an antique white, with additional brown coat as the Mrs requested. (On the picture below was actually my tanned hand when painted our previous project.)


While we finished off this coffee table AG requested a fruit salad, such a good idea in this kind of warm weather. I've checked what's in the fridge as we haven't done our weekly shopping.

We only had cucumber, granny smith and royal gala apple, these won't make a prefect fruit salad, but rujak manis is another good idea for another kind of fruit salad. Normally to make rujak manis you'll need to prepare some tropical fruit such as pineapple, young mango, jicama, young paw paw and star fruit. Without them it won't stop you from making Rujak manis, right?

I had stock of puff tofu which how people from my region serve this salad, accompanied with tapioca crackers. Well, that's how we celebrate warm weather with Indonesian food.


Peanut Sauce for Rujak Manis
  
250 gr palm sugar or gula merah (available in Asian Grocery)
100 ml water
4 pieces red bird eyes chilies (depends on how hot this sauce to be)
1 garlic thinly slice and  and fried
1 tsp cooked shrimp paste (optional)
1 tsp salt
3 tbs fried peanut, grind on food processor
1/2 tbs tamarind, make paste with a bit of warm water

Boil palm sugar in water with slow heat, until it dissolves and thicken. Using  pestle and mortar grind chilies, fried garlic, shrimp paste, and salt into paste , add ground peanut and mix. Add this mixture to dissolved palm sugar, add tamarind paste, mix well. Let this sauce cool before serve.


Wednesday, June 3, 2009

Cwie Mie Malang

cwie mie bellnad

Cwi mie sangat terkenal dihidangkan di warung atau restaurant di Malang, kota kecil 90km dari ibu kota Jawa Timur, Surabaya. Dihidangkan dengan kerenyahan selada dan pangsit goreng. Biasanya disini aku selalu pakek cos lettuce.Lebih lengkap lagi klo ada baksonya :)

Beberapa restaurant ada yang mencampur minyak ayam ke mie yang sudah direbus, karena aku rada gimana gitu ma fat ayam biasanya aku campur dengan minyak bawang, yang udah aku siapin sebelom ngrebus mie. It's kinda gave zing to boiled noodle.

cwie mie


Cwi Mie Malang


Bahan :
400 gr mie keriting
20 lembar kulit pangsit, isi sebagian dengan bahan taburan (aku seh gak pernah ngitung biasanya banyak sekalian)
minyak goreng untuk menggoreng pangsit
Selada cos, cuci bersih
bawang goreng
seledri iris halus
daun bawang iris halus
Sambal
acar timun

Minyak Bawang :
5 butir bawang putih parut
5 sdm kecap asin (kurang lebih)
50 ml minyak (sayah pakek canola oil)
2 sdt minyak wijen

Tumis bawang putih hingga harum dengan minyak, tambahkan dengan kecap asin dan minyak wijen

Taburan:
2 sdm minyak goreng
3 siung bawang putih cincang halus
1 cm jahe, cincang halus
300 g daging ayam (bagian dada tanpa kulit) cincang halus
merica bubuk
garam
1 sdt kecap asin

Kuah
2 sdm minyak goreng
5 siung bawang putih, haluskan
1 sdt jahe parut
2000 ml kaldu ayam
garam, gula merica bubuk

Rebus mie dalam air mendidih, angkat tiriskan, siram dengan air dingin, masukkan dalam mangkuk campur dengan minyak bawang secukupnya. Aduk sampai rata.

Taburan ayam:
Panaskan minyak goreng dalam wajan, tumis bawang putih dan jahe hingga harum, masukkan daging ayam cincang, aduk sampai daging ayam berbutir-butir. Masukkan merica, garam, dan kecap asin, aduk rata, angkat. Dinginkan, haluskan dalam food processor hingga berbutir halus, sisihkan

Kuah:
Panaskan minyak goreng tumis bawang putih dan jahe hingga harum,tuangi kaldu. Tambahkan garam, gula dan merica , didihkan.

Penyajian :
Taruh 2 lembar daun selada di dalam mangkuk. Masukkan mie dan taburan, taburi bawang goreng, daun seledri dan daun bawang diatasnya, Taruh kuah dalam mangkuk terpisah. Sajikan dengan kulit pangsit goreng, dan acar timun dan cabe hijau.


cwie mie

Tuesday, September 30, 2008

Wingko Babat


If you wondering what I'm doing now, I might in the kitchen making this kinda coconut cake as part of my customer order. Every time I make this cake the smell of coconut filled the kitchen and there will be another order from hubby.... lol...
This cake is a form of combo of sweetness and coconut. Here's the recipe that I promised to some of you ^_^

Ini resep yang ala ndeso tradisional banget, gak pakek telur and butter


Wingko
500 gr glutenous rice flour
500 gr grated coconut ( you may find it in a frozen section in Asian Grocery)
600 ml coconut milk
270 gr sugar
1 tsp salt

Put coconut milk in the saucepan bring to boil. Set aside let it cool mix in grated coconut.
On the medium bowl add flour, sugar, salt add coconut mixture mix thoroughly. Pour the mixture into greased square tin. Bake about 40 minute or until golden brown in both side.
It's best cut and served after the next day.

wingko babat

Monday, May 12, 2008

Karaage Chicken

Photobucket

I always make double set of bento in the morning, doesn't take much time as long as things well organized. I prepared karaage chicken the day before, coat with flour and keep on chiller. While waiting for oil in frypan ready, I washed the fruit and baby tree, that's my term of broccoli.

For lil one I kept chicken separate from the bread, so chicken will stay fresh until she ready to eat .


Photobucket

Here's for my bigger girl, she picked her own chick food pick. Accompanied with tzatziki dip.
And this post goes as my entry of wholesome lunchbox, hosted by Coffee and Vanilla.

Photobucket
And now..... recipe...
This is a non alcohol version of karaage

ingredients:
Marinate:
500 maryland fillet (thigh fillet) skin off, striped
4 tbs kikkoman souce (self brew has no alcohol contain)
1 tbs lime juice
1/2 sugar
tiny bit of salt
2 cloves of garlic grated
1 tsp grated ginger

for coating, prepare in a plastic bag
2/3 cup corn starch
1/2 tsp salt
1/2 tsp pepper

Oil for deep fry

method:
  • Marinate the first ingredients above about 1 hour or so.
  • After marinate put the chicken strips in a plastic with flour mixture, shake until completely coated , you can just straight fry it, but it will leave mess on the oil. I prefer leave it for about 10 minutes before fry it.
  • Heat the oil and deep-fry the chicken pieces for 4-5 minutes or until a golden brown

Sunday, May 11, 2008

Sweet Peanut Soup

peanut soup

This dessert brings back my old memory when I work in Malang, small city In Indonesia. There are an old shop sells all sort of Chinese fried bread, but I was there mostly for peanut soup, or so called "wedang kacang" or "kacang kuah". This peanut soup'll yummiliciously melt in your mouth. Usually it served with Chinese savoury fried bread, cakwe, Chinese Indonesian term. I'm sure there are more terms for this kind of bread.

I'll 'bring' this dessert for Mochachocolata Rita's Chinese take out party to celebrate her 88 post. As I think most of friends bring main dishes, I better come up with dessert. ^___^


peanut soup

How to make then ???? well practically it's easy to make, doesn't need much ingredients as long as you have raw blanched peanut, sugar, bit of salt, ginger and and you don't have problem with your tap water.

If you have pressure cooker:
350 gr raw blanched peanut,
75 gr sugar or to taste,
2cm ginger peeled and crushed,
bit of salt
1500 ml water
cook them for 40 minutes .

If pressure cooker still stay there in store, you definitely more time to cook. Soak for one night, and cook for about 2-3 hours in low heat, cook until very tender. It's worthwhile for the -melt in your mouth- peanut soup. I love this.

Tuesday, March 25, 2008

Vanilla Pandan Swiss Roll

Vanilla pandan swiss roll

In most cases, rolling up swiss roll often as soon as it comes out from the oven . Which is I don't ! Rolling up while it is still hot flexible enough to roll without cracking. While, some times it left cake surface stuck to tea towel or baking paper. I prefer to cool down a little while to release steam out. Then roll it using parchment paper or waxed baking paper (I use glad brand (^_^) ). I was success with the first roll followed with many rolls with different idea of flavors.

And another key at baking swiss roll is using upper element/heat in the oven at the last 10 minutes or some only 5 minutes, depends on the oven. The baking period varies from recipe to recipe depend on thickness of the cake. Mostly take 20 to 25 minute.

I tried a lot recipes and sometimes experiment with my own recipe (^_^). For these pictures I used Inong recipe. Blueberries Chiz Roll Which is practically easy and less trouble.


Vanilla pandan swiss roll

No blueberries this time, batter divided into vanilla and pandan instead. Pandan is tropical plant use widely for cooking and baking to enhance the fragrance of the food, juiced with small amount of water to get the beautiful fragrance and color. I didn't use pandan juice though, I used 1/4 tsp pandan paste instead. Available also in Asian grocery (^_^).

Here is the roll recipe:

Ingredients A:
7 egg yolks
4 egg whites
80 gr sugar ( I use icing sugar for less sweet)
50 gr self raising flour
1 tbs milk powder
1 tsp emulsifier (ovalet, sponge, tbm, sp can be purchased in Indonesian grocery)
1 tbs water

Ingredients B:

65 gr butter-- melted
1 tablespoon vanilla extract (I used vanilla crystal)
1/4 tsp pandan paste

Filling:
Raspberry jam
100 gr Shredded cheddar cheese

How to:

Preheat oven at 170 degrees . Lightly grease a swiss roll tin (30x24 cms) & line the base with baking paper.

In electric mixer bowl throw in all the ingredients A. Beat until
white and fluffy. Turn off mixer and add melted butter gradually while stirring, scrap the bottom of the bowl. Add vanilla and spread half the mixture in swiss roll tin. Mix pandan paste on the rest of mixture, DO NOT overmix. Pour into vanilla mixture. Eventually the green mixture will stay in the bottom.
Pop it in the oven for 20 minutes. 10 minutes on lower heat and 10 minutes on upper heat. (Again it depends on your oven !)


Bake for 20 mins. Meanwhile, place a wire rack on a work surface (you can swapped it with tea towel instead), cover with baking paper.

When the cake is cooked, cool down for 5 mins. And turn it out onto baking paper. Spread the jam and cheese. Roll the cake up from the long side, don't worry if you squeeze a little bit. Place the cake seam-side down onto serving tray. Trim each side using serrated knife.


Photobucket

Tuesday, January 22, 2008

Sweet Bun

sweet bun

As a matter of fact I baked bun quite often. Local bakeries are selling bun, somehow they taste better when you make them yourself.

I don't have bread machine, but my Kithenaid (dough hook) mixer always does the job. It comes fairly close to kneading the dough as well as a pair of hands. If you must use a mixer, use a heavy-duty model, as these heavy doughs may burn out the motor of a less powerful mixer.

proofing the sweet bun

This recipe's been with me for long time and been tested over and over. I always make starter first, even I use instant yeast. The good thing with this starter is you will know the yeast is in a good condition, you will notice it from the frothy appears on the top of the milk mixture. If it does not, discard and use a fresh package of yeast

I use bread improver as well, they can change the flavour and characteristics of the bread. Bread improver can be found in bread flour aisle in supermarket. It's not like chemical, some I found has natural product. You may check this ingredient shop too, they sell quite good quality ingredients, for chocolate and bread making.

raising

Spray the rising bread with water before you apply the egg wash can result soft, shiny, and golden top. You can either stuff them with filling or just leave it as an empty bun shape. In this picture I shaped them using muffins pan. The filling choice is up to your liking, red bean paste, chocolate, cheese cream or cheddar cheese.

Sweet Bun
ingredients:
400 gr bread flour (high in protein flour)
100 gr cake flour
100 gr sugar
1 tsp bread improver
1 tsp fine salt
3 tbs (45 ml) sweet condensed milk
4 yolks
100 gr butter

starter:
250 ml lukewarm fresh milk
1 tbs sugar (take from 100 gr sugar from ingredients list above)
11 gr instant yeast

Methods:
make starter first by mix sugar in a lukewarm milk and add yeast, rest about 10 minute until it get frothy.

Place flours, sugar, salt and bread improver in a bowl and lightly mix. Add the rest of the ingredients including starter/milk mixture and knead for about 10-15 minutes until the dough gets smooth and shiny (you can use the kitchenaid or heavy duty food processor). The dough should be sticky and wet, leave the dough in the bowl and cover with plastic cling wrap, rest in a warm draught-free place for about an hour and a half (or until it doubles in size).

Punch down dough and place on a lightly floured surface. It is now ready to form into buns. To make same size buns, roll dough into sausage and cut into small dough and scale to 30-50 grm each. Stuff them with filling and shape into ball. Put buns 5 cm apart in the lightly oiled tin.
Let rise until doubled in size, 30 minutes to 1 hour.

Preheat oven to 170 degrees C. Beat egg yolk with milk and a bit of salt, brush over buns. Bake 20 minutes.


baked sweet bun


sweet bun innard
with cheddar filling

Friday, October 5, 2007

Green Tea Sweets

For most of us today, enjoying green tea doesn't have to drink it from the cup. Adding it on the dessert or baking is way much more fun. This powdered green tea is like something elegance and beautiful appears to crown the dessert, for some green tea lover, absolutely.

This kind of shortbread cookie recipe owned by Kelli Bernard of Amai Tea and Bake House, I got this recipe from her beautiful blog. And her sweets recipe has been tested in some blogger's kitchen since it's a winner of Best Bakery Recipe in Golden Scoop Awards.


powdered green tea
When I was making this shortbread I expected to come out good. It's crumble dough at first I just needed to cover them with freezer bag, in fact I put inside freezer bag before cutting it into leaf shape. Well after baked I was quite happy that this sweets stay in the shape. And.... the girls kept passing them to their mouth while it's cooling down in the rack. To my surprise,the kids love it ^_^ even it's green.

If you are metric person, I'm including my metric conversions. Basically I convert oz to gram rather than cup to gram.

green tea sweets
Green Tea Sweets
by Kelli Bernard
Ingredients

3/4 cup (2.25 oz) Confectioners sugar---> 70 gr
5 oz Unsalted butter, cut into cubes---> 145 gr
1 3/4 cup (8.5 oz) All-purpose flour---> 240 gr
3 Large egg yolks
1.5 TBS Matcha (powdered green tea)---> I only used 5 tsp
1 cup Granulated sugar (for coating)

Directions
  • Preheat the oven to 350F. Line a sheet pan with parchment paper.
  • Whisk the confectioner’s sugar and green tea together in a bowl.
  • Add the butter and green tea/sugar mixture to the bowl of a stand mixer fitted with the paddle attachment. Mix until smooth and light in color.
  • Add the flour and mix until well combined.
  • Add the egg yolks and mix just until the eggs are fully incorporated and a mass forms.
  • Form the dough into a disk and chill in the refrigerator until firm (about 30 minutes).
  • Roll the dough out to ½” thickness.
  • Cut the dough with a leaf cookie cutter.
  • Toss each cut cookie in a bowl of granulated sugar to coat.
  • Place the sugar-coated cookie on a parchment lined pan. Bake at 350F for 12-15 minutes, or until slightly golden around the edges.

Tuesday, August 8, 2006

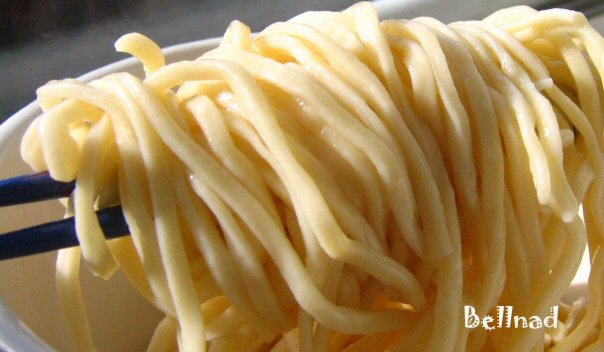
Homemade Noodle

Bulan kemaren ada om yang berkunjung dari Indo, beliau uantiii.. banget ma namanya noodle. Formalin !! formalin !!, katanya. Akhirnya terciptalah resep ini. Gak perlu pusing pakek tepung cakra atawa tepung protein tinggi laennya, semua resep umumnya tersedia di dapur, at least dapurku ha..ha..

Klo kebetulan kamu punya mixer yang kuat buat ngaduk roti. Pakek aza, apalagi buat yang sayang ngeluarin kalori dalam tubuh hehehe...

Caranya masukkan tepung dulu, masukkan telor (hello ! gak pakek kulitnya ya) mulai diaduk pelan deh, masukkan baking powder dan garam, aduk..., air masuuuk... minyak masuuukk....aduk terus sampe kalis. Hasil akhir harusnya kalis cenderung keras, jangan sampe kelemesen deh.

Dimeja yang udah ditaburin tepung, potong adonan menjadi bulatan kecil-kecil kira-kira 6 biji gitu. Biarkan dulu istirahat kira-kira 20 menit si bulatan kasih selimut maksude lap dapur yang bersih gitu lho bukan selimut sungguhan heheh..

Tipiskan bulatan sebelom dimasukkan ke pasta machine/penggilingan. Taburi tepung, giling pada ukuran yang paling besar dulu. Setelah keluar lipat jadi tiga, giling lagi, lipat lagi trus balek giling lagee.... why kok diulang-ulang emang kurang kerjaan ?? digiling sampe 3 kali biar adonan menjadi solid gitu lho, gak bolong-bolong.

Kemudian pindah setting ukuran gilingan ke nomor lima (anggap ukuran yg paling besar nomor satu, jadi nomor lima ini lebih tipis dari nomor satu) Baru sesudah itu masukkan di gilingan untuk mie.
Klo pas keluar dari gilingan untuk bentuk mie adonan bergulung-gulung, itu tandanya adonan minta ditaburin tepung lagi.
Dah deh rebus di air mendidih, sampe keliatan transparant gitu ya.

Walahh mbakyu lah resepnya mana ??? Ini nih...


Homemade Noodle
by Rita

400 gr tepung terigu
3 butir telur
50 ml air
15 ml minyak
1/2 sdt baking powder
1 sdt garam