
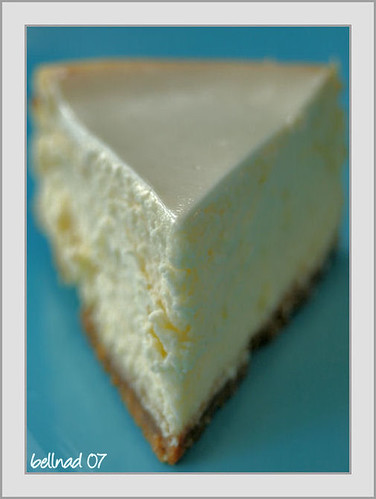
Setelah penantian yang penuh penderitaan selama delapan jam...gigitan pertama rasanya seperti Japanese Cheescake karena mang bahannya banyak persamaannya.. philadephia, lemon zest en juga gula, tepung en telur tentunya. Yang beda yang satu ini pakek sour cream juga buat toppingnya en texturenya lebih padat dari jcc. Karena penggunaan cream cheese yang lebih banyak. Tapi besoknya.. all ingredients blended so well... it taste much better than JCC.. Creamy and clean...Can't wait to make some more ...
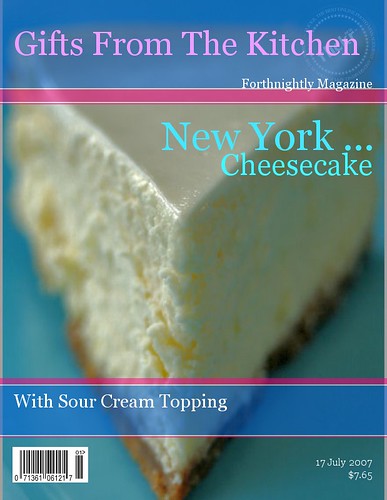 foto hasil maen-maen di flickr toys
There are some watch points though:
- semua bahan harus dalam kondisi suhu ruang
- gak perlu dikocok terlalu lama... karena semakin banyak udara terperangkap.. semakin tinggi cheesecake mengembang en setelah dikeluarin dari oven jadi mengempes dan pecah. Lucky I wasn't (^_^)
Recipe dari Good Food magazine keluaran UK, July 2004, aku cuman pakek 2/3 resep dibawah ini. Pas siap bikin ternyata kemasan philly UK ma AU ternyata beda. Kemasan Philly di sini cuman 250 gr. Tapi jalan terus aw..
New York
- 85ml butter melted, plus extra for tin
- 140g digestive biscuits, made into fine crumbs
- 1 tbsp sugar, granulated or golden caster
FOR THE CHEESECAKE FILLING
- 3 x 300g pack full fat soft cheese (
- 250g golden caster sugar
- 3 tbsp plain flour
- 1½ tsp vanilla extract
- finely grated zest of 1 lemon (about 2 tsp)
- 1½tsp lemon juice
- 3 large eggs, plus 1 yolk
- 284ml carton soured cream-- mix well before use, in this recipe you only need 200 ml, reserved soured cream (84ml) will be added to soured cream topping
FOR THE SOURED CREAM TOPPING
- 142ml carton soured cream (+84ml)
- 1 tbsp golden caster sugar
- 2 tsp lemon juice
- For the filling, increase the oven temperature to fan 200C/conventional 240C/gas 9. In a table top mixer fitted with the paddle attachment, beat the soft cheese at medium-low speed until creamy, about 2 minutes. With the mixer on low, gradually add the sugar, then the flour and a pinch of salt, scraping down the sides of the bowl and the paddle twice.
- Swap the paddle attachment for the whisk. Continue by adding the vanilla, lemon zest and juice. Whisk in the eggs and yolk, one at a time, scraping the bowl and whisk at least twice. Stir the 284ml carton of soured cream until smooth, then measure 200ml/7fl oz (just over 3⁄4 of the carton). Continue on low speed as you add the measured soured cream (reserve the rest). Whisk to blend, but don't over-beat. The batter should be smooth, light and somewhat airy.
- Brush the sides of the springform tin with melted butter and put on a baking sheet. Pour in the filling - if there are any lumps, sink them using a knife - the top should be as smooth as possible. Bake for 10 minutes. Reduce oven temperature to fan 90C/conventional 110C/gas 1⁄4 and bake for 25 minutes more. If you gently shake the tin, the filling should have a slight wobble. Turn off the oven and open the oven door for a cheesecake that's creamy in the centre, or leave it closed if you prefer a drier texture. Let cool in the oven for 2 hours. The cheesecake may get a slight crack on top as it cools.
- Combine the reserved soured cream with the 142ml carton, the sugar and lemon juice for the topping. Spread over the cheesecake right to the edges. Cover loosely with foil and refrigerate for at least 8 hours or overnight.
- Run a round-bladed knife around the sides of the tin to loosen any stuck edges. Unlock the side, slide the cheesecake off the bottom of the tin onto a plate, then slide the parchment paper out from underneath.
Nice pictures Mbak Rita... Oh ya, soal taste keju di roll ketan item itu, hehehe kalah dominan sama ketan itemnya, tapi cocok2 aja menurutku.
ReplyDeleteMbak Rita.....
ReplyDeleteanother fantastic, yummy,and marvellous creation of you...
makes me drooling all the way , when i open your blog..
I dun think, there are some more cheesecake left in the fridge for me....
keep on doing ur good job in baking and cooking..
komennya cuma satu .. mauuuuuuu ... hehehehe. Foto cizkeik-mu benar2 menggoda imanku mbak :D
ReplyDeletehuhuhu udah mau ngeces malah ga bisa liat gambarnya :((
ReplyDeleteo iya lupa mau minta ijin blognya aku link boleh ya :D
ReplyDeletegleksss... gleksss...
ReplyDeletembak... mauuuuuuu plisss dwongg ahh hehehehe...
lain waktu pingin belajar ama mbak rita ahh soal per-cic keik-an
btw aku link ya mbakkk
Rita, kamu yg di MP kan? nahlo lebih suka nongkrong di blogspot yah. Sama nih aku juga demenannya sekarang di blogspot kayaknya lebih enak. MP cuma buat rangkuman doang dr 2 web blogspot ku. Anyway mau bilang lah ini foto2nya keren2 loh. Tapi ada 2 foto yg gw gk bisa liat kenapa yah?
ReplyDeleteFotonya kerennn, kuenya juga pengen nyicipin, belum pernah bikin nih yg namanya cheese cake.
ReplyDeletebu kalo resep dlm bh inggris aku ora mudeng hahaha pake bhs indo aja jadinya amburadul apalagi kalo pake inggris hahaha... enaks bgt ya say tuh cheese cake penampakannya aja dah bkn gw ngiler.. ces ces...sunny
ReplyDeleteHI Rita, sorry baru balesnya sekarang rada sibuk nih. Aku balesnya di blog mu aja yah biar langsung kebaca. Baru aku buka lagi nih blog mu tapi ttp aja gambarnya gk bisa dilihat. Gambar yg ke 3 dan ke 4 yg gk bisa dilihat. Moga bisa diperbaiki yah.
ReplyDeleterit..dapurmu aku link di fooddiary ya, thx..
ReplyDeleteemang rada kemaruk ya Rit..hahahaha...ada dimana2 :D
ReplyDeleteHi Rita, salam kenal ya, aq link nich blognya, cantik bgt tuh foto2nya, jadi mengundang selera....
ReplyDelete